Showing posts with label Snacks. Show all posts

Tuesday, 18 October 2011

Strawberry Jam Tarts


Introducing my exceedingly rustic Strawberry Jam Tarts. Now before you say anything, this was my first attempt at making pastry and to make it more of a challenge I had no biscuit cutters or rolling pin. I don’t make it easy for myself do I? All things considered I think they turned out pretty nicely, they were quick and easy to put together and they taste good too. If your a pastry making King or Queen perhaps stop reading now, but if you too are new to pastry why not give this uber simple recipe a go to get you started.


Adapted from Queen of Crafts
225g plain flour
pinch of salt
1 tbsp icing sugar
110g butter
strawberry jam
cupcake tin
biscuit cutters
  1. In a large bowl, sieve together the flour, salt and icing sugar. Add the butter and rub into the flour with your fingertips until it resembles breadcrumbs. Add cold water, 1 tbsp at a time, to bring the mixture into a dough. It is ready when it just about clings together. It shouldn’t be sticky and should come cleanly off the bowl as you gather it together.
  2. Wrap the dough in cling film and chill in the fridge for about 30 minutes.
  3. Once chilled, take the dough out and leave to warm to room temperature. Meanwhile, preheat the oven to 180C.
  4. Roll out the dough on a surface dusted with flour to about 0.5cm thick. Cut rounds with a fluted biscuit cutter that is slightly larger then the holes of the cupcake tin. Be sure to leave a little pastry to make hearts and strips as decorations.
  5. Grease the tin and line each hole with a round of pastry. Put a spoonful of jam in the centre of each round, being sure not to over fill.
  6. Place the decorations on top of the jam and glaze with a little jam.
  7. Bake for 15 minutes until the pastry is a light golden brown. Remove and cool on a wire rack. 

Saturday, 23 July 2011

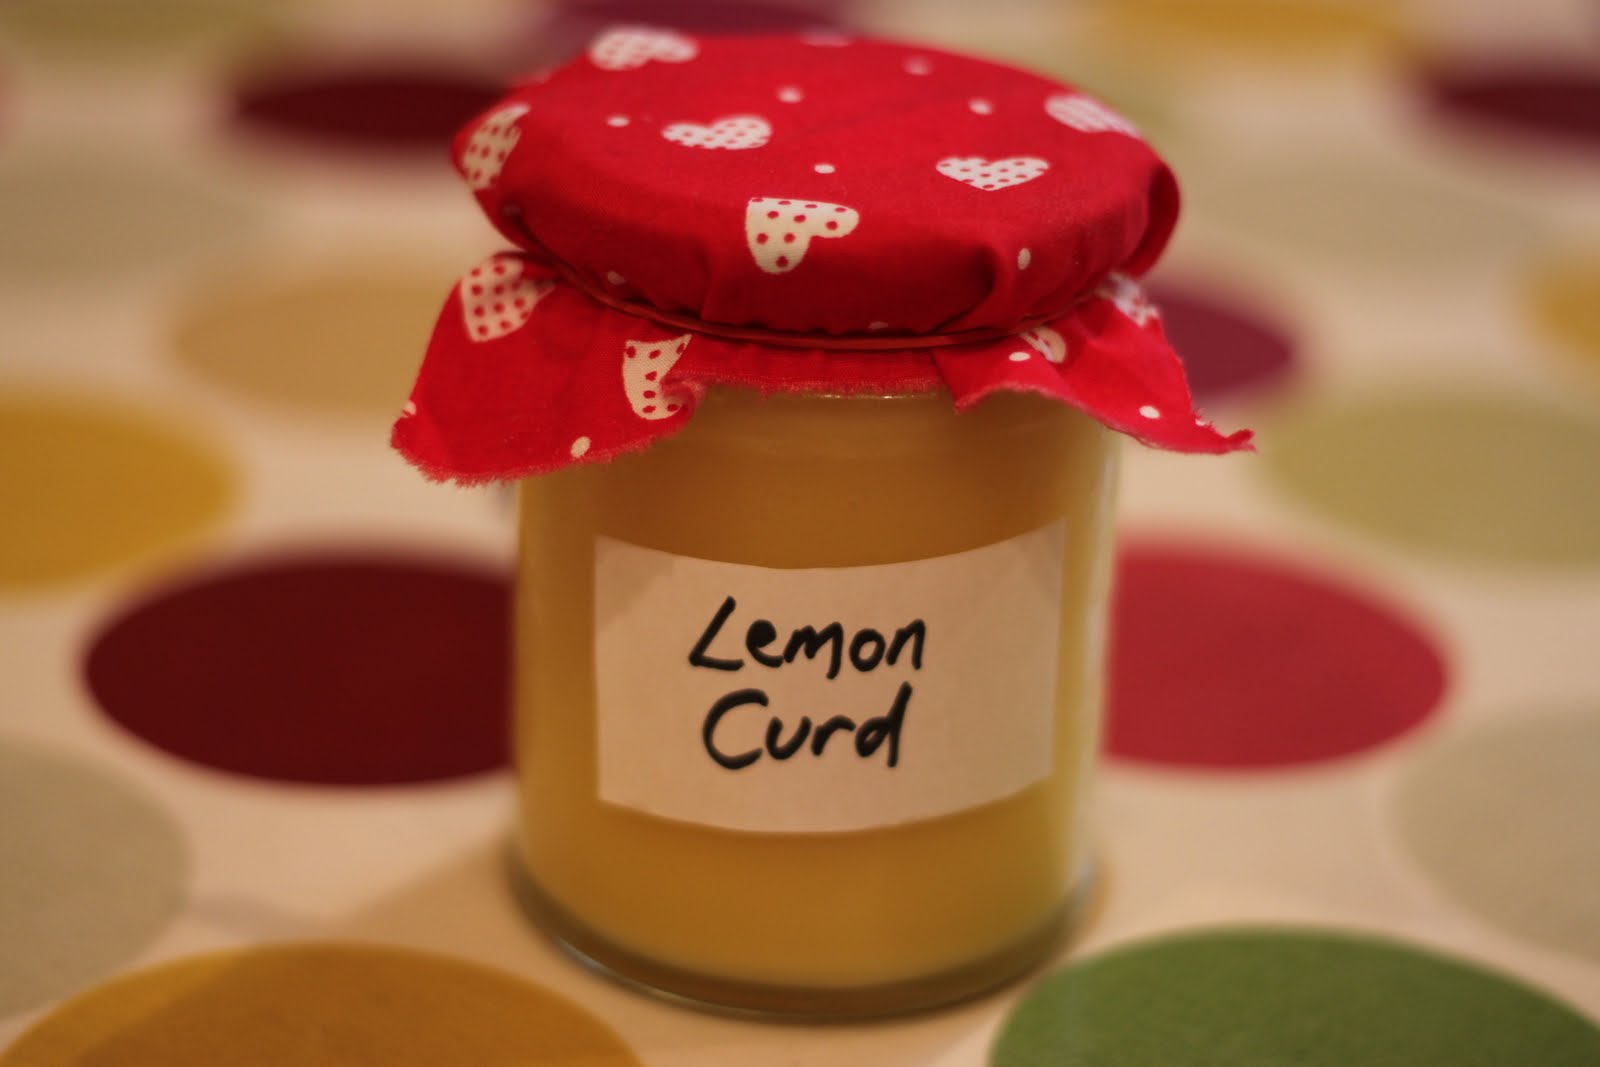
Lemon Curd


I seem to be a little bit obsessed with the flavour of lemon and meringue at the moment. First a lemon meringue fool, and now lemon curd for lemon meringue ice cream. What can I say, it’s a really delicious flavour, and makes me feel a little bit more summery when the weather is so miserable outside. This humble jar of lemon curd marks my first steps into the wonderful world of jarred goods. Just wait till winter when I plan to start a mini production line of chutneys and jams to give as Christmas presents.

http://www.bills-website.co.uk/
This is the first recipe I have tried from my latest book investment, ‘Cook, Eat, Smile’, by Bill Collison. I hope that anyone who has ever visited Brighton has had the pleasure of eating at Bills Produce Store. In a town with plenty of great restaurants and cafĂ©’s Bill’s excels itself at providing the most spectacular and, most importantly, delicious breakfast, brunches, lunches, snacks and suppers, including the best brownie I’ve ever bought. High praise indeed. As well as that, the large, almost warehouse like, dining space, is covered in floor to ceiling shelves filled with lots of lovely jams and crisps and beers and other products labeled with fabulous vintage style labels which make the perfect gifts.

The recipe book follows a similar theme, and really captures the essence of what Bills Produce Store is all about. Separated into seasons, and championing the best in British seasonal produce, the book showcases some of the favourites that are found in the restaurant as well as many other original dishes.


The lemon curd recipe was easy to follow, and very easy to put together, you just need a bit of patience waiting for it to thicken whilst you constantly stir. A funnel would be a useful tool for decanting the curd into sterilized jars, something I learnt the hard way!! The result is a gorgeous golden yellow, thick and zesty lemon curd which tastes nothing like what you would buy at the supermarket and goes great simply spread on toast, or in the lemon meringue ice cream which I should be sharing with you in a couple of days.


Makes 1 medium Jar
60g unsalted butter
2 lemons, zested and juices
2 eggs, lightly beaten
175g caster sugar
a medium sterilized jar (to sterilize run through a hot wash in the dishwasher)
  1. Place a bowl over a pan of gently simmering water and melt the butter in the bowl. Add all the other ingredients and stir to combine with a wooden spoon.
  2. Keep the heat low as you continue to stir the mixture until it thickens and coats the back of spoon. Bill says it should take around 15 minutes but I would say it took me about 25 minutes to reach this point.
  3. Strain the curd into warm sterilized jars and seal. Keep in the fridge for up to three weeks.

Sunday, 29 May 2011

Mini Sausage Rolls


It was my 21st Birthday last December and I hosted a party at the flat to celebrate. I got very excited about hosting, as I always seem to do, and had grand plans to make heaps of nibbles to go with the case of Prosecco I bought. In the end I ended up getting everything from Sainsburys, and only managed to make the strawberry vodka jelly shots and a plate of smoke salmon bilinis. Poor effort I know. Well if only I had known how easy to make these little morsels of sausage deliciousness are, my guests would have had them coming out of their ears. Prepared ahead and baked in a preheated oven for 20 minutes and you’ve got the perfect finger food for a party or picnic (or a quick and easy snack for any day).


Adapted from Nigella Kitchen
Makes around 70
Packet ready rolled puff pastry, defrosted
1 egg
2 packets of original frankfurters
  1. Preheat the oven to 220C. Roll out the pastry and cut into pre-measured strips that are the length and width of the sausage. Beat the egg in a bowl (Nigella brushes the egg wash over the pastry strips, but I found this made them very difficult to assemble so I just put the wash over the top of the prepared rolls before putting them in the oven).
  2. Roll the sausages up in the pastry strips and cut each into 4 pieces, ensure you don’t unroll the rolls!! Then place on a baking sheet.
  3. Paint the tops of the rolls with the egg wash (I didn’t have a brush so dribbled it over with a spoon). Bake in the oven for 15 to 20 minutes until the pastry has puffed up and is golden in colour.

Culinary Know How: FRESHER
Budget: UNDER £4
Kitchen Requirements: BAKING SHEET, SMALL BOWL, BRUSH OR SPOON.

Wednesday, 25 May 2011

Apple and Cinnamon Muffins


I never imagined these apple and cinnamon muffins turning out as good as they have. They’re certainly proving to be an excellent decision what with all the work that I’m doing at the moment. I’m just hoping that the batch will last me to the end of the week, they are so moreish. My only previous muffin experience consists of a chocolate chip variation, another Nigella, that turned out a little less successfully. Cupcake cases too small and I over stirred the mixture making them too heavy. This time I was fully prepared with proper muffin cases and a more controlled stirring technique. The result was a light and fluffy muffin, moist due to the chunks of apple, and with an added crunch from the cinnamon, almond and sugar coating. As I have a cold I was a little overzealous with the cinnamon (just to make sure that I could taste them) but this certainly wasn’t to their detriment, they taste absolutely gorgeous.


Makes 12
2 eating apples
250g plain flour
2 tsp ground cinnamon
125g light brown sugar (plus 4 for sprinkling)
125ml honey
2 eggs
60ml runny natural yogurt (I used thick greek yoghurt and it worked out fine)
125ml vegetable oil
2 tsp baking powder
75g natural unblanched almonds
  1. Preheat the oven to 200C and line the muffin tin with cases.
  2. Peel and core the apple, then chopped into 1cm cubes. Measure the flour, baking powder  and 1 tsp cinnamon into a large mixing bowl.
  3. In another bowl, whisk together the oil, yoghurt, eggs, honey and sugar.
  4. Chop the almonds roughly and add half to the flour mixture. Mix the other half into a small bowl with 4tsp sugar and 1tsp cinnamon, and put to one side.
  5. Fold the wet ingredients into the dry and add the chopped apple. Stir to combine, but don’t other mix, you’re aiming for a lumpy batter.
  6. Spoon the batter into the muffin papers and sprinkle the almond, sugar and cinnamon mixture on top. Bake for 20 minutes until they have risen and are golden.
  7. Let the muffins cool in the tin for 5 minutes before transferring to a wire cooling rack.

Culinary Know How: FRESHER
Budget: UNDER £3
Kitchen Requirements: MUFFIN TIN, MUFFIN CASES, TWO MIXING BOWLS, WHISK.

Tuesday, 24 May 2011

Churros


The lack of posts this week is due to an increase in my university workload, namely a timed essay that’s in on Thursday. It doesn’t mean I’ve stopped cooking completely, just that I’m cooking less adventurous things. However, this weekend I had a three day Nigella cook-athon. I’m one of those people who has phases on cook books. I’ll get it, cook everything that stands out and then it’ll be on to the next one. I got the Nigella book in question, ‘Kitchen’ for Christmas and used it all through January, put it away, and now its having its second airing. Although it pains me to say it, I have a bit of a love hate relationship with everyone’s favourite domestic goddess. Now don’t get me wrong, obviously she is amazing, I am a fan on facebook, watch her programmes and drool over her recipe books, but I find that her recipes are a tad hit or miss. I think I am alone in this but I do find a lot of her recipes go a bit wrong for me, most memorably toad in the hole, turkey meatballs and chocolate pots which were total culinary disasters!! Luckily only one recipe went wrong this weekend, the Indian rubbed lamb cutlets, and the rest were roaring successes.

Exploding Chocolate Pots
Flat as a Pancake Toad in the Hole
The first recipe that I had to share with you was the wonderful Churros one. I love to pick up a bag of these sugary doughy treats when on holiday in Spain. I think I doubled my body weight eating them at the Primavera Sound Festival in Barcelona the other year (they make the best festival breakfast), but I haven’t really found any of comparable quality in England. The great thing about churros is that they are blissfully simple to make, and can be knocked together quickly and with ingredients that you’re likely to have in your cupboard. Dip these little drops of sugary goodness in a chocolate sauce of choice; Nigella makes her own thick chocolate dipping sauce but I used Nutella, just as good in my opinion.


Culinary Know How: 2ND YEAR
Budget: UNDER £2
Kitchen Requirements: SMALLISH SAUCEPAN, MIXING BOWL, ICING BAG WITH METAL TIP (I USED A 1CM CIRCLE TIP), SCISSORS. 

Thursday, 14 April 2011

Tzatziki


Greece is one of my most favourite places in all of the world. Since my first visit aged about 6 I have visited maybe 12, 13, 14 times more, but my mum has been about 50!! I love the people, the places, the dry heat, the blue seas and the food. I have a bit of an addiction to tzatziki, I can’t think of anything better then a lunch of tzatziki and chips, washed down with a can of Mythos. Unfortunately, British supermarkets can’t seem to get it quite right, there is never enough garlic and the cucumber is cubed rather then grated as it is to be found in Greece. This recipe is so easy to make, you really don’t need to make do with shop bought variations. I like a good hit of garlic, so use large cloves of garlic, but you may chose to half the quantity if you’re not so keen on it.


½ cucumber, deseeded and grated
2 tsp salt
150ml greek yoghurt
juice of ½ lemon
1 garlic clove, peeled and crushed
  1. Mix the grated cucumber with the salt in a bowl and leave for 10 minutes. Pour off the excess water and then put the cucumber in to the centre of a pile of kitchen paper towels. Gather at the edges and twist and squeeze to remove the moisture.
  2. Put into the bowl, add the remaining ingredients, mix and then taste to see if any more of one ingredient is required.
  3. Serve with hot dishes, at barbecues, with salads, on burgers, in fajitas or simply dip some crisps into it, the possibilities are endless.
Culinary Know How: FRESHER
Budget: UNDER £2
Kitchen Requirements: GARLIC CRUSHER, GRATER, BOWL, PAPER KITCHEN TOWELL.

Thursday, 17 February 2011

Two Ways with Sweet Potato

The humble sweet potato is a versatile carbohydrate and a staple of my kitchen cupboard. It’s nice to have a different option to the trusty potato every now and again, and they taste good tossed into a curry, simply cubed and boiled, mashed or even chipped.


Sweet Potato Curry:
I know it’s another curry, but I really can’t say enough how perfectly suited they are to the student budget and kitchen. One big pan, lots of lovely leftovers and store cupboard basics, and you’ve got your self a flavoursome and eternally changing meal. I made this one before a night out, its heat and stodginess providing a defense against the long night ahead. I’d never tried a vegetarian curry before, but the sweet potato provided a great meat substitute.


Serves 2
½ onion
large glug of vegetable oil
1cm piece of fresh ginger
1 tsp ground coriander
1 tsp ground cumin
½ tsp cayenne pepper
½ tsp turmeric
200g chopped tomato (1/2 tin)
2 average sized sweet potatoes
½ cauliflower
200g coconut milk (1/2 tin)
50g cashew nuts
handful of frozen peas
  1. Peel the onion, roughly chop and fry in the oil in a large frying pan for 5 minutes. Peel the garlic and crush, and peel the ginger and finely chop. Add to the pan and fry for 1 minute. Add the spices and cook for 2 minutes.
  2. Add the tomatoes and peeled and cubed sweet potatoes (I suggest just over bite sized or they won’t cook in time). Cook for thirty minutes over a low heat, covered with a lid, adding water if it appears to be drying out.
  3. Add the florets of cauliflower and the coconut milk. Put the lid on and simmer for around 8 minutes, or until the cauliflower is soft. Add the peas for the final 2 minutes.
  4. Meanwhile, toast the nuts in a dry frying pan.
  5. Season and add nuts just before serving on rice.
 Culinary Know How: FRESHER
Budget: UNDER £5
Kitchen Requirements: LARGE FRYING PAN WITH LID, SMALLER FRYING PAN, SAUCE PAN FOR RICE.

Sweet Potato Fries:
Cut into fine strips and sprinkled with salt, these sweet potato chips make a tasty snack, and best of all they take less then five minutes to make.


Sweet Potato
Vegetable Oil
Salt
  1. Finely slice the sweet potatoes into slim chips, leaving the skins on.
  2. Fry small batches in hot vegetable oil until golden.
  3. Drain, dab off with kitchen towel, season with salt and eat immediately.
Culinary Know How: FRESHER
Budget: UNDER £1
Kitchen Requirements: FRYING PAN.

Thursday, 10 February 2011

Cheese and Ham Muffins


These are a great option when you’re running to catch the bus, and want a quick bite of something tasty. A good choice for breakfast, elevenses, teatime, or anytime you’re feeling peckish really, they are quick to put together and can be stored in an airtight container.


Makes 12
6 slices of ham
190g cheddar cheese
75g butter
1 egg
250ml milk
300g self-raising flour
½ teaspoon paprika
  1. Preheat oven to 190C and lightly grease a muffin tin. Cut the ham in to 1 cm chunks and grate the cheddar. Cut the butter into pieces. Beat the egg in a bowl with the milk.
  2. Sieve the flour, paprika and a pinch of salt into a large mixing bowl, and rub the butter into the flour until it looks like breadcrumbs.
  3. Add the chopped ham and grated cheese, then stir in the egg and milk mix thoroughly.
  4. Spoon into the muffin tin and cook in the oven for 20 minutes. Place on a wire rack to cool.
Culinary Know How: FRESHER
Budget: UNDER £5
Kitchen Requirements: MUFFIN TIN, LARGE MIXING BOWL, WIRE RACK.

Monday, 24 January 2011

My First Kitchen Disaster (and a good Guacamole)


It was all going great until I got it to the pan. My beautiful handcrafted quesadillas, stuffed with spring onions and red pepper, shredded left over chicken and heaps of mature cheddar, were just too perfect. The heat was too high and my flipping skills to slow, the first ended up all charred and the majority of the second ended up on the hob. Luckily, the partially raw materials still tasted pretty good, especially with the addition of my homemade guacamole, my best yet, and some shop bought salsa. If you fancy trying where I failed, the quesadilla recipe I used can be found at Jamie Oliver’s website. The guacamole recipe on the other hand can be found below.


1 large ripe avocado
1 large tomato, diced
Juice of 1 lemon
1 small garlic clove, crushed
Salt and black pepper
  1. Scoop out the flesh of the avocado and mash with a fork in a bowl. Stir in the tomato, juice and garlic, and add seasoning.
  2. Mix all the ingredients together, check the seasoning, and eat within 2 days.

Culinary Know How: FRESHER
Budget: UNDER £2
Kitchen Requirements: A BOWL AND A FORK
Related Posts Plugin for WordPress, Blogger...