Showing posts with label Cake. Show all posts

Monday, 24 December 2012

Christmas Cake: Part Two 'Wreath Design'


So here it is, Part Two of this years Christmas Cake creation. The presents have been bought, wrapped and placed under the tree, the larder has been stocked and the first Guylian seashell of the season has been scoffed. It was time for one of my last, and most favourite Christmas traditions of the year, decorating the cake. Scan down to the next post and you will see that with the help of Dad (and Delia) I made my first Christmas cake from scratch, so spent a long time deciding on the best way to decorate it, to truly do it justice.

Past decorations have included Santa’s and Trees, Presents and Carol Singers, a classy Candle creation and a slightly less classy Christmas dinner spread. This year I opted for the traditional Christmas Wreath, and went all out buying edible powders, glitters and stars to make it dazzle.


I started by putting a layer of marzipan and icing on to the cake, before creating the holly and ivy leaves by hand, which I painted in situ on the cake.


I created sparkly paint by mixing the gel colours with golden powder, which created a beautiful metallic effect. I then added berries for the holly before rolling out strips of marzipan to create ribbons that appear wound around the wreath and a big bow to finish the whole thing off. 

I finally sprinkled some edible gold stars over the wreath, and VOILA, my Christmas Cake of 2012 was complete.


Wishing all my lovely readers an Exceedingly Happy Christmas!!

Sunday, 18 November 2012

Christmas Cake: Part One

Chopped candied peel and raisins, sultanas, currants, cherries and Brandy

I write this whilst watching Home Alone, my first Christmas movie of the year. I don’t know about you but I am fully in the Christmas mood already, my christmas list is written, I’ve loved seeing the lights go up around town, and have thoroughly enjoyed bookmarking recipes in the extra special sparkly December issue of Good Food. Making the all important Christmas Cake was quite literally the icing on the cake. 

Ready to be mixed then covered and left overnight

Last weekend my grandmother celebrated her 80th Birthday, and all the family descended on Bath for the festivities. This was a brilliant excuse for my dad and I to make the Christmas Cake, the first one I’ve ever made. 

Fruit being mixed into flour, butter, egg and spices mix

We opted for Delia Smiths classic Christmas Cake recipe, and I thought I would share with you some snaps of the cake thus far. I must say the baking seemed to go without a hitch, except for the minor panic when we realised we were pretty short on large mixing bowls. 

Mixed

The recipe was easy to follow, and although I had to get the train back to Brighton before it came out of the oven, my dad assures me it looked and smelt great. 

Ready for the oven

Now its been wrapped up, except for the occasional brandy feeding, until its time to decorate. Stay tuned for Part Two, coming your way in a month or so!! 

All wrapped up for its 4 and a half hours in the oven

Ta Da!!


Monday, 30 April 2012

Raspberry Layer Cake with Raspberry Swiss Meringue Buttercream


It was one of my best friend Maddy’s 22nd Birthday on Saturday, and I knew I just had to make her a cake to celebrate. I opted for a Raspberry Layer Cake with Raspberry Swiss Meringue Buttercream. I had made Swiss Meringue buttercream before, for Ben’s Rainbow Cake, and knew I had to try it again; it's honestly like eating a cloud. 


I weighed out the cake batter, splitting it three ways to make a slightly taller cake, and then sandwiched each layer with a little raspberry jam, the buttercream and a sprinkle of fresh raspberries. On top I plonked a good layer of buttercream, and then covered it entirely with fresh raspberries - mostly because it looked pretty, but also because my buttercream didn’t go exactly to plan. Last time I made swiss meringue buttercream with Rose it went perfectly, but this time it just didn’t really do its thing. First, it went a little soupy, so I popped it in the fridge, but then it went a little lumpy, so I whacked the KitchenAid up to high speed and hoped for the best. Unfortunately, it just didn’t come together, so I gave up, added a little seedless raspberry jam, and went with it. It tasted perfect, and that’s the most important thing, and once I’d added the fresh raspberries it looked pretty good. And so the Rustic Raspberry Layer Cake with Raspberry Swiss Meringue Buttercream was born. 

So much cake.
Fast forward to the party, and Maddy got to blow out the candles on not one but two Birthday cakes, her lovely boyfriend Tony bought a deliciously decadent brownie cheesecake from the Hummingbird Bakery. It was a fabulous night, filled with far too much cake and wine, so Thank You Maddy, and Happy Birthday once again!!


Adapted from Good Food
-For the Cake-
4 eggs
225g caster sugar
225g self raising flour
2 tsp baking powder
225g butter, at room temperature
Loads of fresh raspberries
1 tbsp raspberry jam 
  1. Preheat the oven to 180C. Grease and line the bottom of 3 20cm cake tine (if you only have two like me, you might have to do this in stages).
  2. Mix all the ingredients together until combined, but not over-mixed. It should drop off the spoon easily. 
  3. Divide the mixture between the tins. I did this by weighing the mixing bowl empty and then with the mixture. I minus-ed the bowl weight from the other weight and then divided by three. 
  4. Place the tins on the middle shelf of the oven and bake for about 25 minutes until the cakes are golden brown and coming away from the edge of the tin. Press gently to check they spring back.
  5. Leave in the tins for 5 minutes, then ease the cakes out with a palette knife. Cool on a wire rack, and make the buttercream (see below).
  6. Place one of the cooled cake on to a plate, spread over some jam, then buttercream, and sprinkle over some fresh raspberries. Repeat this process once more, and then on the top layer, just smooth over the buttercream, and cover with more fresh raspberries. 
Adapted from Whisk Kid 
-For the Buttercream-
300g caster sugar
7 egg whites
381g unsalted butter, at room temperature and cut into small cubes
1 tbsp seedless raspberry jam
  1. In a small saucepan, heat the egg whites and sugar, whisking constantly until the sugar is completely dissolved. To check this, rub some of the mixture between your fingers, it should be completely smooth.
  2. Pour into a bowl, a stand mixer works best, and whip on high speed. Then, on a low speed, add the butter, waiting until each piece is combined with the mixture before adding the next one. 
  3. Beat until the mixture is light and fluffy, then add the jam and beat to combine. 
If you have issues with your buttercream like I did on this occasion, check out Whisk Kids excellent guide to Swiss Meringue Buttercream HERE


Monday, 16 January 2012

My KitchenAid: Not Just a Pretty Face


Here it is, my pride and joy, my KitchenAid. Still stuck for names, all suggestions welcome, but I have finally got to use this baby, and I am oh so happy with the results. I’d been lusting after this particular piece of kitchen equipment for a long time, and I can’t quite believe it is now sitting on my worktop in all its red shiny glory. Thankfully, she’s not just about the looks and the first recipe I tried, Chocolate Orange Cupcakes from the second Great British Bake Off book (also available on the BBC Good Food website), certainly lived up to my expectations (I used only milk chocolate throughout the recipe, hence the discrepancy with the original recipe photographs!). 


The KitchenAid standmixer is supremely easy to use, consisting of just two levers, one to lift and set down the head and the other to adjust the speed of the mixer. The bowl is easy to fit into place, and although I have found the attachments a little tricky to fit, I think this will get easier with practice. The pourer/guard attachment that came with my KitchenAid is a godsend, and fits easily over the bowl.


As I added the ingredients and beat according to instructions I became more and more confident with using a higher speed setting. I’ve only gotten up to 5 so far and think if I pushed it any higher the thing might actually take off, its just so fast. I might seriously have to reconsider my January healthy eating regime, because making cake just became dangerously quick and easy. What would have once taken a good 20 minutes of hard graft can now be completed in under 5, and the result is far more professional, smooth and lump-free then I could ever achieve by hand. After baking for the allotted time, the cupcakes turned out uniformly perfect, with a light fluffy texture.

But it was in the making of the buttercream that the KitchenAid truly shined. I do not get on with frostings, and have never been able to get mine to the correct pipeable consistency. That is until now, because with a quick flick of the switch I made smooth and thick buttercream for the first time. So thick it started to ooze out of the seams of my piping bag, but what did make it on to the cake looked professional and stayed in place. I managed to make peaks, peaks I tell you!!

Piping bag fail.

So what can I say except that I am totally and utterly in love with my beautiful red KitchenAid. You’re not just a pretty face after all!! 


Thursday, 29 December 2011

Happy Christmas!!


A belated Merry Christmas to you all!! I hope that you have all had a wonderful time, however you choose to celebrate. I am pleased to report that all my culinary related Christmas wishes came true and I am now the proud owner of a red KitchenAid Stand Mixer, as well as numerous baking tins, cutters and icing nibs. I also have 6 new recipe books to add to my now overflowing collection.


As expected, I have eaten a lot of very good food and generally over indulged as in only right during the festive period. My Christmas culinary conquest offerings starts with the Christmas cake that I decorate every Christmas Eve. Penguins, carol singers, flowers and of course Father Christmas have all adorned the top of my cake over the years, but this year I opted for something completely different and created a Christmas Lunch table on my cake. Consisting of a candle centrepiece, turkey, Chistmas Pudding and crackers amongst other things, I created the decorations by moulding marzipan and painting each with food colouring. It’s certainly a conversation starter!!


Thursday, 3 November 2011

Halloween Cupcakes


Wishing you all a belated Happy Halloween!! I hope you had the most gorgeously ghoulish of times. I ended up working on the actual night, but managed to attend a Zombie party and dress up as the Solar System over the weekend. And I got in to the spirit by baking and decorating some creepy cupcakes to celebrate.


For the teeth cupcakes I made pink buttercream and attached some sweet toothy accessories, for the devil cupcakes I fashioned devil horns and tails from ready made icing and placed on to more coloured buttercream, and my friend Rose put together some fantastically scary spiders using more of the coloured readymade icing. 


Tuesday, 11 October 2011

Banana Fudge Layer Cake


I write this while sitting in the kitchen of my wonderful friend and fellow food lover Rose, at the second of our newly founded lunch dates (last week I cooked Naan Pizzas, this week I am being treated to Leek and Potato Soup). She’s very kindly allowing me to abuse her internet as much as I like, I have no internet until the 26th, and she’s giving me yummy food to boot. This has provided me with the perfect excuse to check up on my favourite food blogs and update you with my most recent culinary conquest.

Now although I did little cooking in the last month I did invest in two new fantastic cook books (its becoming an addiction), one being Mad Hungry, my first proper American cookbook complete with cup measurements, and the other being The Great British Bake Off: How to Bake, a baking book made to accompany the brilliant BBC2 series (with 50% off at Waterstones now I couldn’t resist!). This week Ben started working at the Tic Toc Café in Brighton, where he now prepares food and makes coffee, and asked me to bake a cake for the first evening opening of the café. I was more then happy to oblige, partly to make a good first impression but mostly because I couldn’t wait to get stuck into my baking book. After a quick flick of the Cake section I went for the Banana Fudge Layer Cake, having all but a couple of the ingredients in the kitchen. Now I speak from experience here, use an electric mixer. Creaming butter with a wooden spoon for a sustained length of time gave me blisters, not cool. Luckily, the injuries where worth it. The cake tasted great, the sponge light and the fudge and banana slices making each mouthful deliciously sweet. Making the fudge was surprisingly easy too, and I plan on using the same recipe to make blocks of fudge wrapped in cellophane as presents. Yum.

Makes one 20.5cm cake
- For the Sponge -
175g unsalted butter, softened
25g light brown muscovado sugar
175g self raising flour
1 tbsp milk
150g caster sugar
3 large free-range eggs, at room temperature, beaten
½ tsp vanilla extract
- For the Filling and Topping -
175g light brown muscovado sugar
75g double cream
1 ripe banana
150g unsalted butter
  1. Preheat the oven to 180C and grease two 20.5cm sandwich tins (lining the bases with baking paper). Beat the softened butter in a mixing bowl with a wooden spoon or electric mixer until creamy. Add the two sugars and beat well until the mixture is light and fluffy.
  2. Gradually add the egg, beating after each addition. Add a tablespoon of the flour with the last portion of egg to stop the mixture from curdling.
  3. Sift in the remaining flour and fold into the mixture with a metal spoon.
  4. Mix the vanilla extract and milk before folding into the mixture.
  5. Divide the mixture equally between the two prepared tins and spread evenly. Bake in the oven for 18 to 20 minutes until the cakes are a light golden colour and just firm enough to the touch. Turn out the sponges on to a wire rack to cool completely.
  6. Meanwhile, make the fudge by heating the butter, cream and sugar in a medium pan over a low heat. Stir frequently until the butter has melted. Increase the heat a little and simmer for 3 minutes, stirring frequently to keep the mixture from catching.
  7. Remove from the heat and stir vigorously for 30 seconds. Leave to cool, stirring gently occasionally. It will gradually thicken and is ready to use once it has become spreadable (You may need to put it in the fridge for a few minutes).
  8. Spread the fudge evenly on to each cake, swirling the fudge on the top cake with the back of a spoon or round bladed knife. Arrange the thinly sliced banana slices on top of the fudge on the bottom cake before sandwiching the two cakes together.
  9. Store in an airtight container for up to four days.

Wednesday, 25 May 2011

Apple and Cinnamon Muffins


I never imagined these apple and cinnamon muffins turning out as good as they have. They’re certainly proving to be an excellent decision what with all the work that I’m doing at the moment. I’m just hoping that the batch will last me to the end of the week, they are so moreish. My only previous muffin experience consists of a chocolate chip variation, another Nigella, that turned out a little less successfully. Cupcake cases too small and I over stirred the mixture making them too heavy. This time I was fully prepared with proper muffin cases and a more controlled stirring technique. The result was a light and fluffy muffin, moist due to the chunks of apple, and with an added crunch from the cinnamon, almond and sugar coating. As I have a cold I was a little overzealous with the cinnamon (just to make sure that I could taste them) but this certainly wasn’t to their detriment, they taste absolutely gorgeous.


Makes 12
2 eating apples
250g plain flour
2 tsp ground cinnamon
125g light brown sugar (plus 4 for sprinkling)
125ml honey
2 eggs
60ml runny natural yogurt (I used thick greek yoghurt and it worked out fine)
125ml vegetable oil
2 tsp baking powder
75g natural unblanched almonds
  1. Preheat the oven to 200C and line the muffin tin with cases.
  2. Peel and core the apple, then chopped into 1cm cubes. Measure the flour, baking powder  and 1 tsp cinnamon into a large mixing bowl.
  3. In another bowl, whisk together the oil, yoghurt, eggs, honey and sugar.
  4. Chop the almonds roughly and add half to the flour mixture. Mix the other half into a small bowl with 4tsp sugar and 1tsp cinnamon, and put to one side.
  5. Fold the wet ingredients into the dry and add the chopped apple. Stir to combine, but don’t other mix, you’re aiming for a lumpy batter.
  6. Spoon the batter into the muffin papers and sprinkle the almond, sugar and cinnamon mixture on top. Bake for 20 minutes until they have risen and are golden.
  7. Let the muffins cool in the tin for 5 minutes before transferring to a wire cooling rack.

Culinary Know How: FRESHER
Budget: UNDER £3
Kitchen Requirements: MUFFIN TIN, MUFFIN CASES, TWO MIXING BOWLS, WHISK.

Monday, 28 March 2011

Banana Bread


I always remember making banana bread with my dad when I was little. I used to love the stuff, but surprisingly haven’t tried making it for years. Ben hates bananas, but he was brave enough to give this ago and absolutely loved it. The bread came out really sweet, with just the right hint of banana, nothing too overpowering. It’s also brilliantly simple. If you have an electric mixer you can knock up the batter in under ten minutes, and it doesn’t take too much longer to mix it all up by hand.


Makes one loaf
75g soft butter
4 ripe bananas
200g soft brown sugar
1 egg, beaten
1 tablespoon vanilla extract
1 teaspoon bicarbonate of soda
pinch of salt
170g plain white flour
  1. Preheat the oven to 180C and line 23x13x6cm loaf tin with a loaf liner or grease with some extra butter.
  2. Mash the bananas in a big mixing bowl. Add the butter, egg, sugar, vanilla extract, bicarbonate of soda, salt and mix in the flour last. Pour into the loaf tin and bake in the oven for 1 hour. Remove and cool on a wire rack.

Culinary Know How: FRESHER
Budget: UNDER £4
Kitchen Requirements: LOAF TIN, LARGE MIXING BOWL.

Thursday, 24 March 2011

Buttercream for Cupcakes


I adore making and eating cupcakes. They’re so quick and easy to make, and its even quicker to devour them. One of the best things about them is that there are so many variations, and when they come out of the oven you’re left with a blank canvas, ready to be decorated with a multitude of edible glitters and sprinkles. I’ve tried ‘making’ icing in the past (basically icing sugar and water), but have always been left with a translucent mess of a cupcake. This time I was a bit more daring and decided to try my hand at a simple buttercream. It really was simple, and made the decorating a whole lot more fun. I invested in a piping bag and nozzle when I attempted macaroons, and was able to use it in this instance too. I’m by no means an expert but I am really quite pleased with how some of them have turned out. And as for the rest, I simply flattened them out with a knife so nobody was any the wiser as to how inept I am with a piping bag!!


 Makes enough Buttercream for 12 cupcakes
150g butter, softened
375g icing sugar
seeds of half a vanilla pod
food colouring (optional)
  1. Put all the ingredients, except the food colouring, into a large mixing bowl and beat well until the mixture becomes light and fluffy (this will take a fair bit of perseverance).
  2. Separate the mixture into other bowls if you wish to add a few drops of food colouring to make coloured icing (I used red and blue).
  3. When the cupcakes are cool, ice with the buttercream. Either create a spiral effect using a piping bag, or put a blob of the buttercream on to each cake and flatten out with a knife.

Culinary Know How: FRESHER
Budget: UNDER £2
Kitchen Requirements: LARGE MIXING BOWL.


PS. Spring has officially arrived in England (just look at the view from my window), I hope you're all enjoying the sunshine. On that note, I'm off to the beach!!

Saturday, 12 March 2011

The Ultimate Chocolate Cake


Yesterday was Ben’s Birthday and I decided to mark the occasion with the most calorific cake I have ever known. This is definitely the cake that Bruce Bogtrotter was forced to eat by the evil Miss Trunchbull in ‘Matilda’, crammed full of sugar and dark chocolate, and smothered with yet more melted chocolate, it certainly won’t appeal to anyone watching their waistline. I’ve only managed a sliver so far, but I can assure you that it is very good, rich yes, but the texture is surprisingly light, considering what’s been packed in to it. Most importantly the Birthday Boy was impressed, as were his friends.


I followed this BBC Good Food recipe, pretty much to the letter, except I substituted half the dark chocolate that was going into the ganache with milk chocolate (I’m not all that keen on the bitterness of dark chocolate) and halved the cake mixture into two cake tins to make a sandwich, rather then risk cutting it into three. I also checked on the cakes after they had been in the oven for 1 hour, and they were already cooked (although this may just be my oven). Happy 25th Birthday Baby!!


Culinary Know How: FRESHER
Budget: UNDER £10
Kitchen Requirements: TWO CAKE TINS, COOLING RACK, LARGE MIXING BOWL, SMALL MIXING BOWL, SAUCEPAN.

Tuesday, 1 March 2011

Lemon Drizzle Cake


Last night Ben and I went to see True Grit, and due to the extortionate price of cinema food, I decided to make my own snacks to munch on during the film. I went for the very healthy combination of cheese straws and lemon drizzle cake, the cake being something I’d wanted to try for a while now. I followed a very simple BBC Good Food recipe, the only change I made was to add the zest of two lemons, rather then one, as I like my cake extra lemony. Although the drizzle was more transparent then I had hoped it created a lovely crust. The cake is heavy, crammed with sugar and butter and drenched in lemon juice, but I suppose this is what makes it so tasty. And the film was good too!!


Culinary Know How: FRESHER
Budget: UNDER £3
Kitchen Requirements: LARGE MIXING BOWL, LOAF TIN, BAKING PARCHMENT. 

Monday, 31 January 2011

Victoria Sandwich Cake


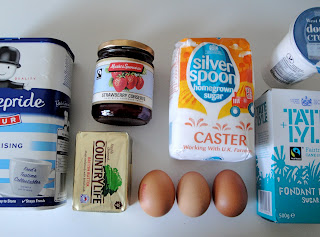
Ben and mines 30 month anniversary was very much a food orientated celebration. He took me for Thai and I baked him a cake, the same one that I cooked him on the day he originally asked me out. I’ve made it a million times and its always reliably tasty, although I don’t know how something that includes a large amount of whipped cream and jam couldn’t taste anything but lovely. You do need a few items that might not be readily available in every student kitchen, such as a large mixing bowl and two cake tins but these can be bought relatively cheaply and are a great investment. I used strawberry jam, but you can use whatever takes your fancy, and if you’re not feeling too indulgent you can omit the cream, although I strongly advise you not to.


175g soft butter
175g caster sugar
3 beaten eggs
175g self-raising white flour
Jam
Cream
  1. Grease two cake tins and preheat the oven to 190 degrees.
  2. Beat the butter and sugar in a large mixing bowl until pale and fluffy. Beat in the eggs a little at a time. Fold in ½ the flour using a metal spoon or a plastic bladed spatula, and then the remainder.
  3. Divide evenly between the tins and level the surface. Bake in the centre of the oven for 20 minutes until they are risen and spring back when pushed in centre.
  4. Loosen the edges and leave in the tin for five minutes.
  5. Turn out and leave to cool on a wire rack.
  6. Sandwich with jam and cream.
Culinary Know How: FRESHER
Budget: UNDER £5
Kitchen Requirements: TWO CAKE TINS, LARGE MIXING BOWL, METAL SPOON OR PLASTIC BLADED SPATULA. 

Related Posts Plugin for WordPress, Blogger...